Nic's Closet Core Patterns Carolyn Pyjamas

Hands up if you love PJs!
Hi everyone I’m Nic (@onelittlebutton on Instagram) and if you’re anything like me you would know how excited I was when Katie at Sew Sew Sew asked me to do a blog post on one of my favourite sewing patterns, Closet Core Carolyn Pajamas. I wanted to share my sewing journey and maybe even a few helpful tips along the way.

Fabric shopping
Sometimes the hardest part is finding the right fabric, for me I took inspiration from Designers such as Ted Baker and found this gorgeous Victoria Cotton Sateen. I was making the long sleeve and trouser version so had a good 3 metres to work with. I also chose some white piping to use that would pop on the cuffs and collar.
Top tip: I know piping is easy enough to sew but save yourself some time and buy some ready made, I used 3mm.
Cut and run
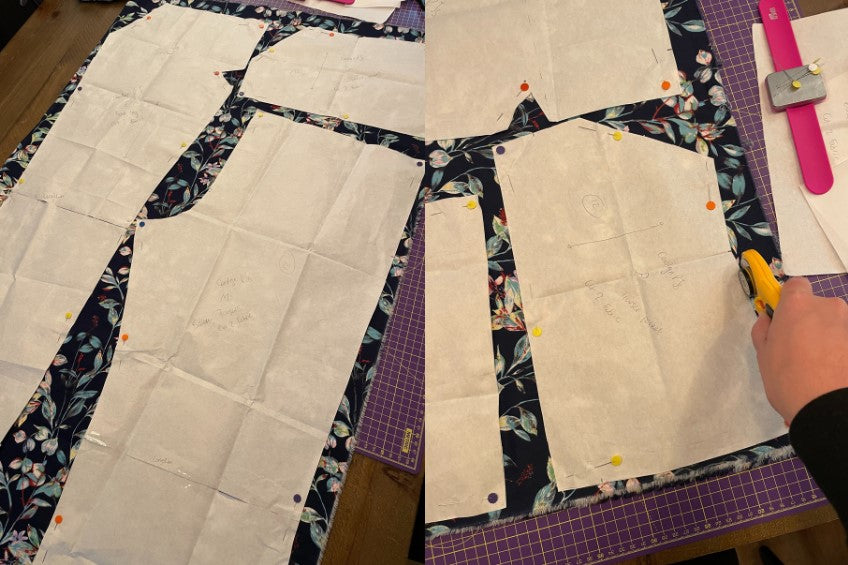
So one of my best birthday presents one year was a super large cutting board and for projects like this it’s amazing! I can lay out the fabric and play pattern Tetris just before I get slicing with my rotary cutter. I hate waste so I will play about with pattern layouts for some time to make sure I get the absolute best fit.

Top Tip: I bought some large metal plates from Wickes which make the best pattern weights and allow me to move things about really easily.
And we’re off!
Once I’d cut everything out and marked up the notches I was ready to get going. I started with the trousers as I was desperate to take them away on holiday with me. First job was sewing the pocket in place. Don’t forget the interfacing at this stage for the bias cut or you’ll soon find yourself with baggy pockets!

Adding piping to the pocket edges and cuffs is a great way to take these trousers to the next level. Next it was the inside seams, this is where they really start to take shape.

For the waistband I used 1“ wide elastic and reduced the waistband fabric slightly. I made the channel first then guided the elastic through the hole using a safety pin on one end.

Top tip: If you’re adding a me made label to the centre back start your waistband stitch towards one side at the back. This way you’ll get a nice smooth stitch line over the label.

Getting shirty
Once I was back from holiday it was time to start on the top. It always daunts me to begin with but then I take it one step at a time and it all starts to become clear and comes together nicely. Closet Core instructions are really great, plus there are some great sew a longs online if you get super stuck with something.

The first thing is applying the pocket to the front of the shirt. My advice is take your time, press and use lots of pins or better yet baste it on first.
Top Tip: I sew a triangle at the start and finish of the pocket stitch (along the top part). This prevents the pocket pulling away from the fabric later
Neatly does it…
I decided to do some French seams on the inside of the shirt (as much as possible) for a neat finish. To do this I put the fabric pieces wrong sides together and did a stitch line a few mm from the edge. Then I trimmed back any excess and folded the fabric back to be right sides together before pressing and stitching, encasing the seam allowance from before. It’s an extra step but so worth it.
For the sleeves I decided I was going to construct them fully then set them into the bodice. After I French seamed the length of the sleeve I attached the piped cuffs so that I could encase all the raw edges. Once the sleeves were complete I attached them to the bodice using my overlocker.

When it came to the collar I spent a lot of time reading the instructions over and over and watching a video on YouTube. I feel like they’re so scary but then I give it a go and tadah a collar! I finished this off with a me made label and a good press!

Button up
Using the button guide I marked up the button holes and used an automatic stitch to complete them. Once opened up I then pinned the shirt together and marked the position of the buttons using a fabric pen.

Top Top: If you use a seam ripper top open your button holes the. Place a pin at the top of the hole so that you can’t accidentally rip through the stitches (if you’ve done it before you know how much it makes you want to cry!) Finish off the holes with a little fray check to give a nice neat finish.
For the first time ever I made fabric covered buttons. I was surprised how simple they were to make and love how professional it makes the shirt look!
Hem
I don’t know about you but sometimes when I get to the hem part of a project I have to remind myself to take it slow and don’t rush to finish. This is especially true when hemming curves. I tend to pin up the hem at the sides and centre back then work in sections until it’s all pinned in place.

Finally a good old press over everything, grab my hot chocolate and snuggle on down in my new handmade PJs!

** Nic was given the fabric and a matching thread in exchange for this blog post
2 comments
Hi, I made a size 12 (which is what I usually am in store bought clothes). They have great shape and are still loose enough to be comfortable for sleeping in.
These are lovely. I would have liked to know the size you went for and how they fit. 😊💕